

March Madness - Pattern Matching
- Sara Chisholm
- Feb 29, 2024
- 5 min read
Learn Sara's Scotch-Tape Method
Pattern matching may be one of the craziest things we undertake. Cutting up fabric, to sew it all back together as if it were never cut?!? WHAT?!? It is a method that works fantastically to show off large motifs that might not have otherwise fit on your piece, or to extend a design to fill an area.
Pattern matching can be tough, but I'm going to share my "scotch tape" method, which for me, makes it just a little easier.
Supplies:
cardboard or acrylic templates for cutting shapes with seam allowances. If you haven't made these yet, this is when you will want them. There is a tutorial for this HERE.
Washable glue stick - I use plain old purple Elmer's washable glue sticks from the dollar store. This is one of those times that even if you are normally a thread baster like me, the glue really makes a difference.
Fabric marking pencil or marker. You will be adding your "cut lines", so something you can see is more important than something that will disappear, unless your fabric is very light colored.
Scotch Tape used to temporarily hold a piece in a matched pattern location until you can get it cut out and basted. I find the Scotch brand is a bit stickier than no name brands, but it's only temporary. Masking tape also works for this, but its harder to be sure your pattern hasn't shifted with masking tape.
Method:
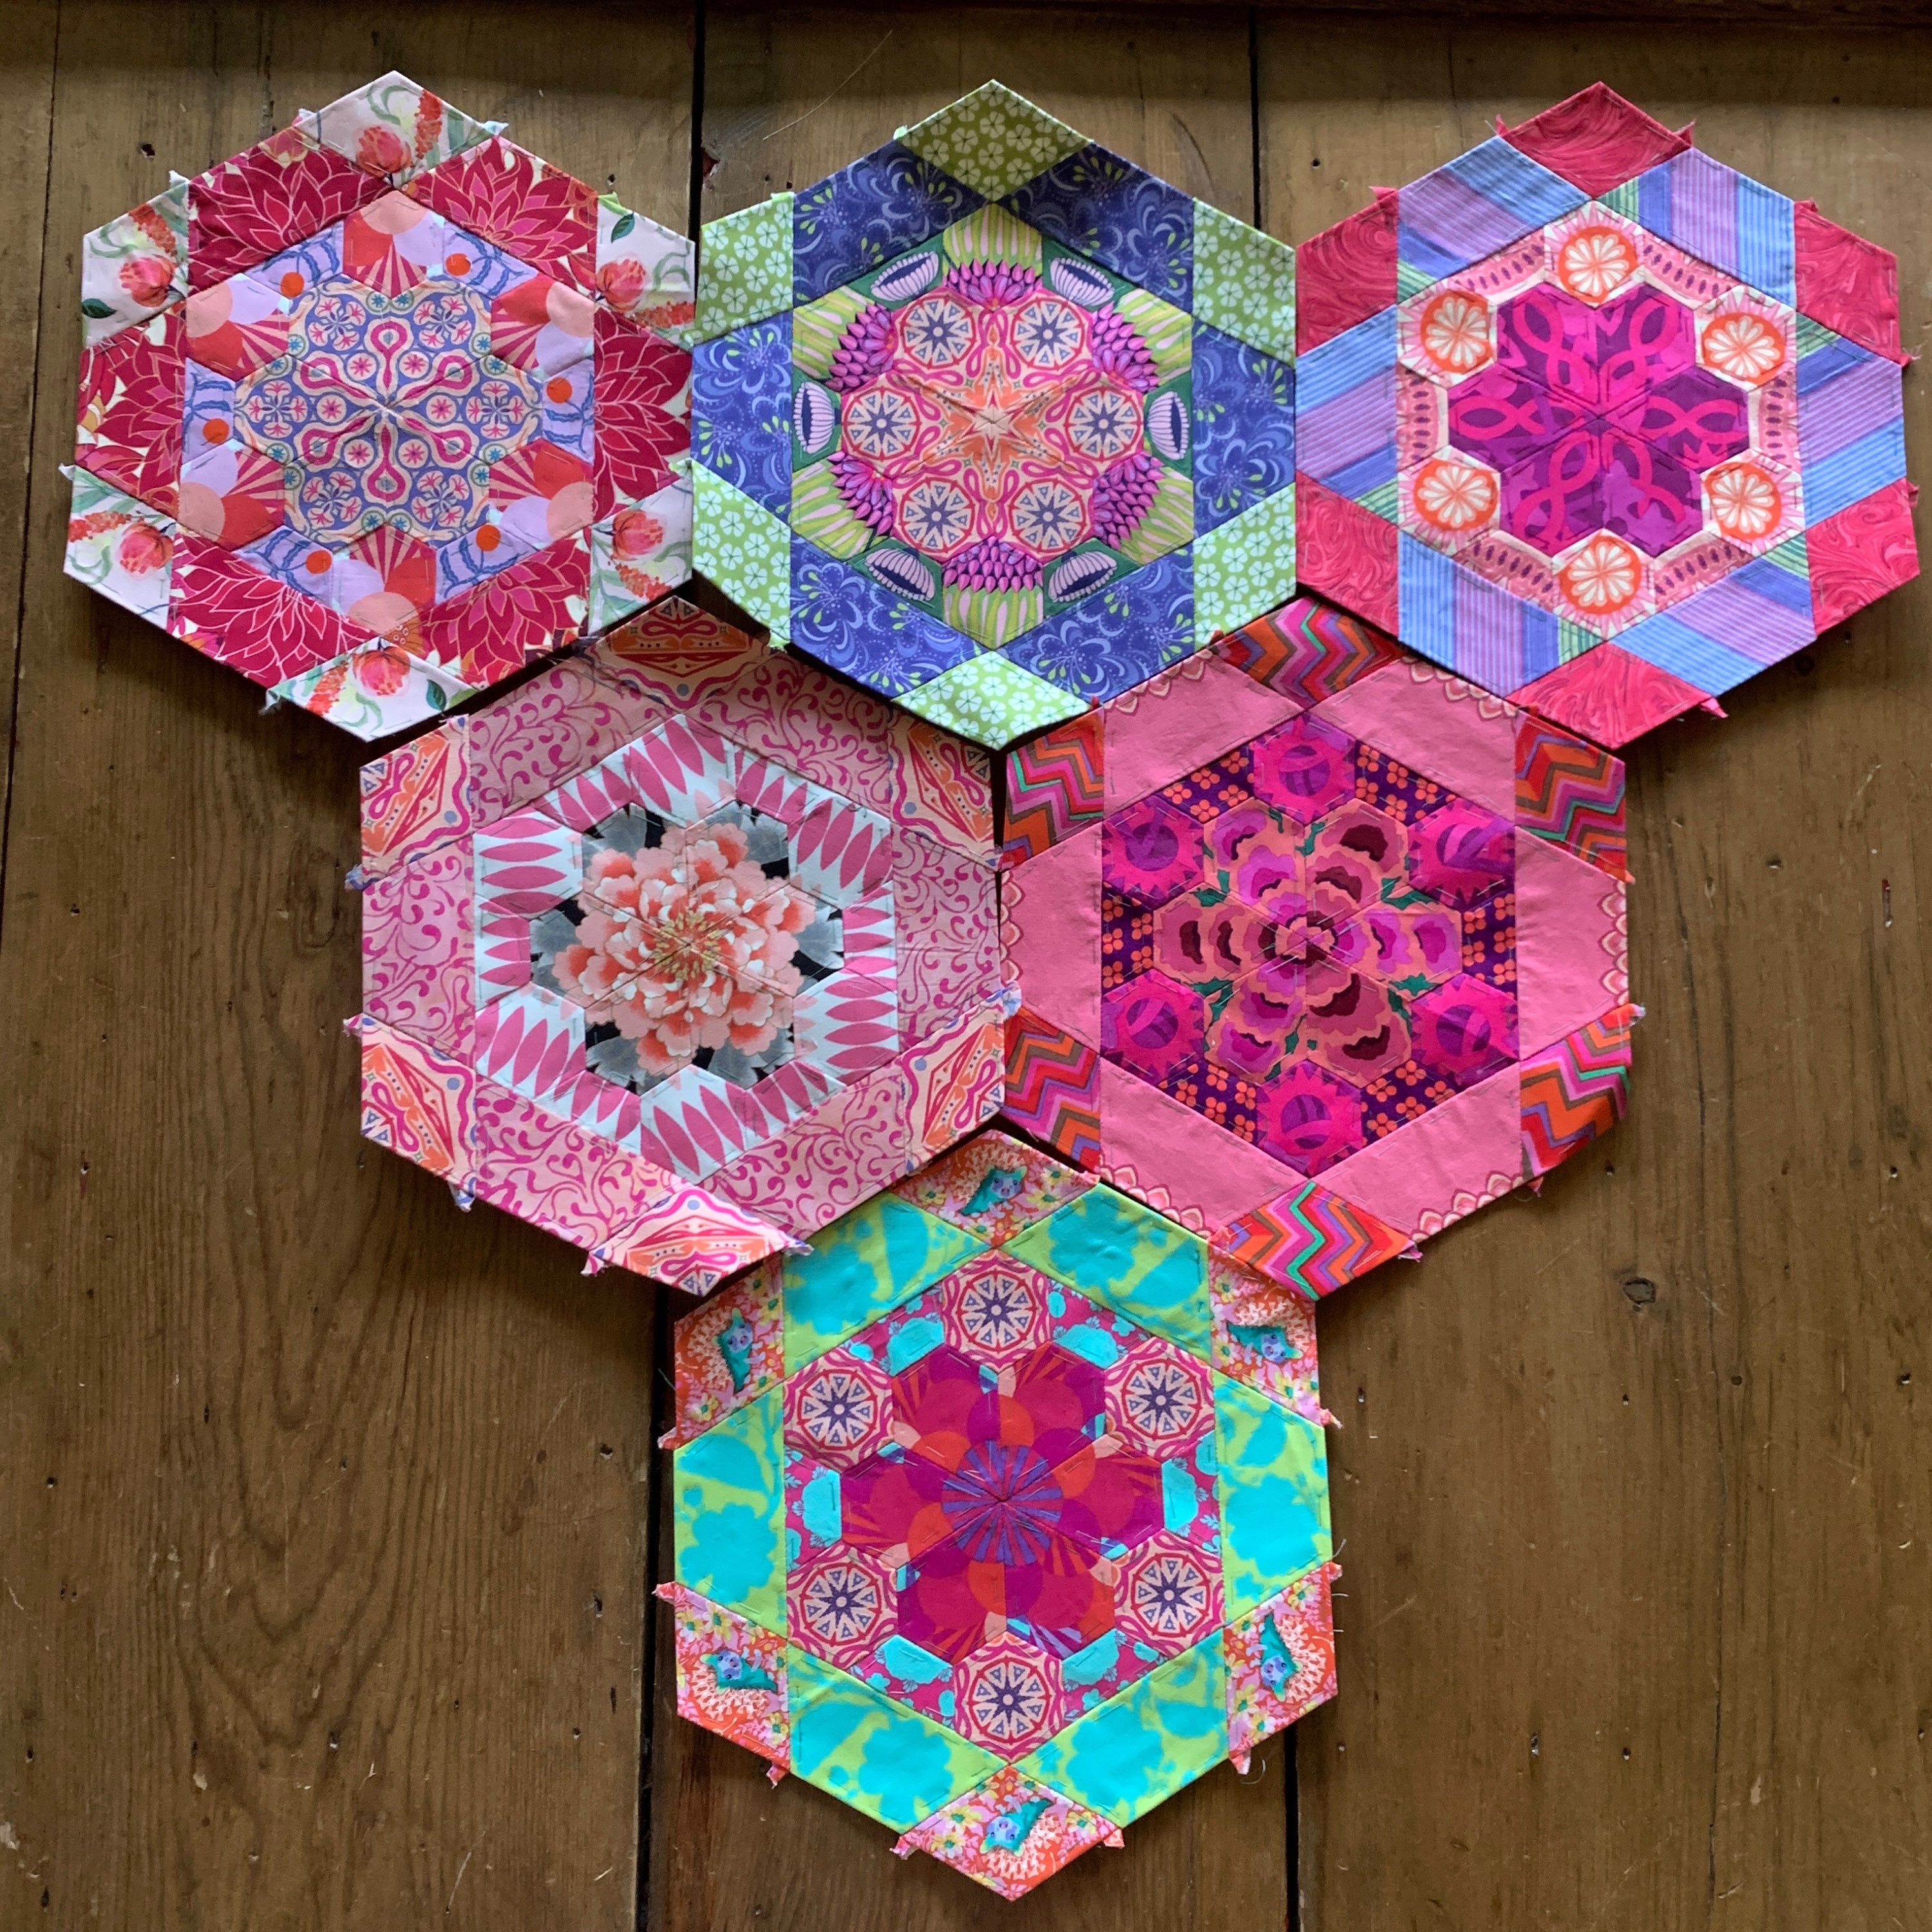
In this example, I am going to pattern match the six jewel shapes that make the center of the Esther Block. I will apologize in advance for the nasty bruise on my thumbnail. I had a bit of an issue while moving a refrigerator and my thumb lost.

Decide what will be the center of the design and cut your first shape. in this case, I chose the center(ish) of the boat motif in this Tula Pink print. I find it helpful to try to be straight on the design as it helps me with alignment later, but it is not necessary if your design works differently. You will see my cutting lines marked on the fabric. I like to do this on the RIGHT SIDE of the fabric, so I am sure, through the process, that I am getting what I want. Cut out and baste this piece of fabric to your paper using your preferred method. I thread baste.

Lay this first basted piece on top of the fabric and align the pattern on a 'fresh' area of the design. Align all sides of the piece to the pattern as best you can. It is easy to get sideways a bit and have your last piece be very difficult to fit if you don't align all sides.
Scotch Tape the side you intend to cut next, along the matching side. In this case, you will see the tape on the left long side.

Leaving the Scotch Tape in place, use the template that includes the seam allowances, to trace the cutting lines for the next piece. You will have to flip the basted piece out of the way to draw the back cutting line.
Leaving the scotch tape in place, cut the piece out of the fabric.

With the Scotch tape still in place, finger press the seam allowance over to meet the first piece.
This is a good opportunity to check your pattern matching on both sides of the piece. If it doesn't match on the back, it likely doesn't match on the front and you can shift it a little.

With the scotch tape still in place,
Apply glue to one side of the next paper piece. Slide it in, with the glue side down, until it is nestled nicely in the seam allowance you just finger pressed and is aligned at the point and the corner with the first piece. Press it down to adhere the paper piece to the fabric. Check your alignment by flipping back the seam allowance and/or folding down the adjacent sides of fabric to see that things look like they are going to go together well.
If you don't like how it is aligned, remove the paper, apply more glue and try again. When you are happy with the alignment, leaving the scotch tape still in place, glue baste all the edges to the back of the paper.

Since I am a thread baster and worry that my glue won't hold, I baste again, with thread, right through the scotch tape. You may or may not find this necessary.

Finally, we are ready to sew the first seam! Keeping the scotch tape in place, use your preferred method to sew these two pieces together. I am a whip-stitcher, so I fold the pieces right sides together and align. I like to sew about 1/2" to get things started, knot my thread, and remove the scotch tape before I continue. I find this keeps me aligned for the start, but also, keeps me from sewing through the scotch tape. Sew to the end of the seam and knot your thread. I often cut my thread here, just to keep it away from the next pattern match.
If you are a flat back stitcher, flip that baby over just the way it is and stitch the seam, then remove the tape.
Open it up and we will repeat the process for the rest of the pieces of the block. I like to alternate sides as I go so I finish at the bottom center, but there is no particular reason for this. You can finish anywhere you like. I will warn you, the last one is the hardest to match so if there is an area of your print with less elements to match, it might be nice to end there.

Align and tape
Trace the shape and cut.

Fold the edge, glue the paper and baste., Sew it up and do that again, and again.

When you get to the last one, you will want to scotch-tape both sides in place before you trace your shape - and fold both sides in on the back to fit your paper. Be extra aware of where that point is landing and that your top edges are meeting nicely.
Hopefully, if you have followed along, you are left with a result that you are happy with.


I went ahead and pattern matched the hexagons of the next round into mine before I continued on, but this is not necessary at all! (Laura called me a show-off - but truly it felt like it was what fit the fabric best)
You may only want to pattern match one small section and that is fine! or follow Laura's examples and pattern match in sets of two for your first time.
I hope that seeing this method has inspired you to try just a little pattern matching in your EPP life!
\If you have any questions, please reach out to me and I will try to answer them!


I love the block and the prompts. I hope it’s not too late to join in the fun.